How to Use Windows on Mac: A Comprehensive Guide
If you’re a Mac user but need to use Windows for certain applications or tasks, you’re in luck!!
It’s entirely possible to run Windows on a Mac, either through virtualization software or by using Apple’s own Boot Camp. In this article, we’ll take a deep dive into the world of using Windows on a Mac, exploring the various methods, tools, and tips to get you up and running in no time.
Macs are incredibly popular among creative professionals, designers, and other users who value performance, stability, and style. However, certain applications and software may only be available on Windows or may perform better on the Microsoft operating system. In such cases, you may need to run Windows on your Mac, either as a virtual machine or by dual-booting.
Running Windows on a Mac may seem daunting at first, especially if you’re not familiar with virtualization or Boot Camp. However, with the right tools and guidance, it’s a relatively straightforward process that can greatly expand your computing capabilities. In this article, we’ll walk you through the steps of running Windows on a Mac, from choosing the right method to troubleshooting common issues.

Why You Might Need to Use Windows on Mac
There are several reasons why you may need or want to use Windows on your Mac. For example:
- You have software or applications that are only available on Windows, or that perform better on Windows than on macOS.
- You need to use Windows-specific hardware, such as printers or scanners, that don’t have macOS drivers or support.
- You need to test or develop software that runs on Windows, such as cross-platform applications or web services.
- You prefer the user interface, workflow, or features of Windows over macOS for certain tasks or projects.
Whatever your reason for needing Windows on your Mac, there are several methods you can use to achieve this.
Using Virtualization Software
One of the most popular and flexible ways to run Windows on a Mac is to use virtualization software. This approach allows you to create a virtual machine (VM) that runs a full version of Windows within macOS, without the need to reboot or switch between operating systems.
There are several virtualization software options available for Mac users, including:
- Parallels Desktop (Most Popular Choice)
- VMware Fusion
- VirtualBox
- CrossOver
Each of these tools has its pros and cons, depending on your specific needs and preferences. However, the general steps for using virtualization software to run Windows on a Mac are similar:
- Choose and purchase a virtualization software license that’s compatible with your Mac and desired version of Windows.
- Download and install the virtualization software on your Mac.
- Create a new virtual machine, specifying the type and version of Windows you want to install.
- Insert your Windows installation media (such as a DVD or ISO file) into your Mac, and follow the on-screen instructions to install Windows within the virtual machine.
- Configure your virtual machine settings, such as memory, CPU, and storage allocation, as well as any shared folders, networking, or other features you need.
- Launch your virtual machine and start using Windows on your Mac!
Using virtualization software to run Windows on a Mac has several advantages, including:
- Flexibility: You can run multiple instances of Windows or other operating systems within your macOS environment, and easily switch between them as needed.
- Compatibility: Virtualization software allows you to run almost any Windows application or software on your Mac, without the need for specialized hardware or drivers.
- Convenience: You can use Windows and macOS applications side-by-side, and easily transfer files or data between them.
- Security: Running Windows within a virtual machine provides an added layer of security and isolation, as any malware or viruses are contained within the VM and can’t infect your macOS environment.
However, there are also some drawbacks to using virtualization software, such as:
- Performance: Running Windows within a virtual machine requires more system resources, such as RAM and CPU, which may slow down your Mac’s performance or require hardware upgrades.
- Integration: While virtualization software allows you to run Windows and macOS applications side-by-side, there may be some limitations or compatibility issues with certain software or hardware.
- Cost: Virtualization software can be expensive, especially if you need multiple licenses or advanced features.
- Complexity: Setting up and configuring a virtual machine can be time-consuming and challenging, especially for novice users.
Virtualization With Parallels
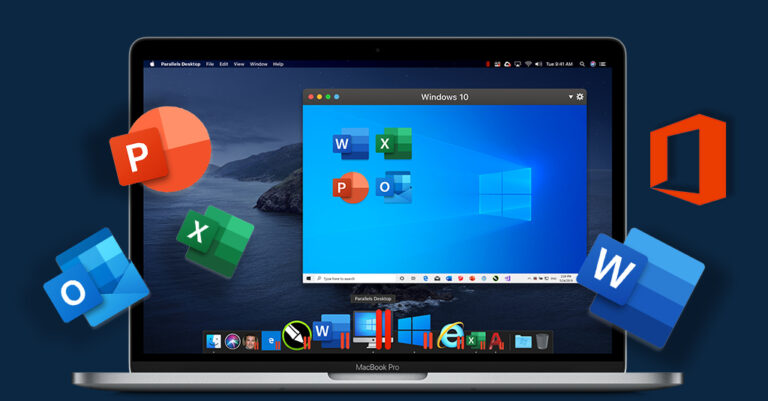
Of all the virtualization software, Parallels is one of the very best and finely built with 7 million plus users. Parallels Desktop for Mac is a virtualization software that allows Mac users to run Windows applications seamlessly on their Mac. It creates a virtual machine on your Mac, which allows you to run Windows in a separate environment while still using your Mac’s resources.

Key Features
Parallels Desktop for Mac offers many features that make it a must-have for Mac users who need to use Windows applications. Here are some of the key features:
Seamless Integration
With Parallels Desktop for Mac, you can run Windows applications just like you would on a Windows computer. You can use your Mac’s keyboard and mouse to control Windows applications and copy and paste between Mac and Windows seamlessly.
Performance
Parallels Desktop for Mac offers excellent performance, with up to 64 GB of RAM and up to 32 virtual CPUs. It also supports DirectX 11 and OpenGL 3.3, which means you can run graphics-intensive applications without any problems.
Easy Set-Up
Parallels Desktop for Mac is easy to set up and use. You can install Windows on your virtual machine with just a few clicks, and Parallels Desktop for Mac will automatically configure your virtual machine for optimal performance.
Security
Parallels Desktop for Mac also offers security features such as encrypted VMs and password protection for your virtual machines.
How to Use Parallels Desktop for Mac
Using Parallels Desktop for Mac is easy. Here’s how you can set it up and use it:
Step 1: Install Parallels Desktop for Mac
You can download Parallels Desktop for Mac from the Parallels website or from the Mac App Store. Once you’ve downloaded and installed it, launch the application.
Step 2: Create a New Virtual Machine
Click on the “New” button to create a new virtual machine. Follow the on-screen instructions to install Windows on your virtual machine.
Step 3: Install Windows Applications
Once you’ve installed Windows on your virtual machine, you can install Windows applications just like you would on a Windows computer.
Step 4: Use Windows Applications
You can launch Windows applications from the Parallels Desktop for Mac application or from your Mac’s Dock. You can use your Mac’s keyboard and mouse to control Windows applications.

Method 2: Using Boot Camp
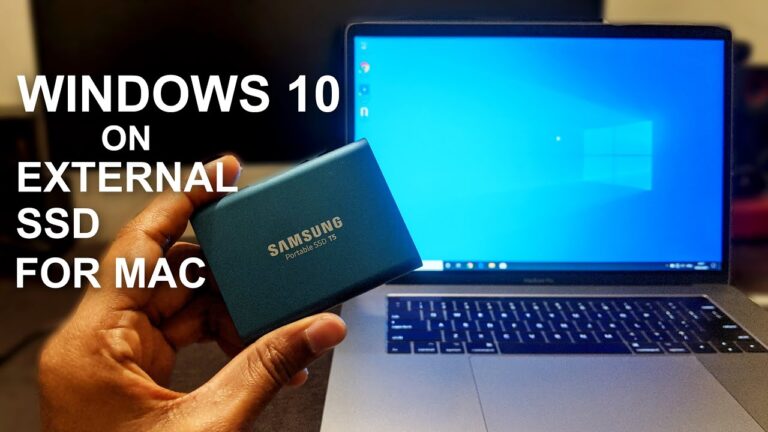
Another popular method for running Windows on a Mac is to use Apple’s Boot Camp. This approach involves partitioning your Mac’s hard drive and installing Windows as a separate operating system, alongside macOS.
Using Boot Camp to run Windows on a Mac has several advantages, such as:
- Performance: Running Windows natively on your Mac, without the overhead of a virtual machine, can provide better performance and speed.
- Integration: Installing Windows as a separate operating system allows for more seamless integration with Windows-specific hardware or software.
- Cost: Boot Camp is a free tool that comes pre-installed on all modern Macs, so there’s no additional cost to use it.
- Simplicity: While setting up Boot Camp can be a bit more involved than using virtualization software, the process is generally straightforward and well-documented.
However, there are also some drawbacks to using Boot Camp, including:
- Inflexibility: Unlike virtualization software, which allows you to switch between Windows and macOS on-the-fly, using Boot Camp requires you to reboot your Mac and choose which operating system to boot into.
- Compatibility: Some software or hardware may not work properly or at all in a Boot Camp environment, especially if it requires macOS-specific drivers or features.
- Storage: Partitioning your hard drive to install Windows using Boot Camp will reduce the amount of available storage space for both operating systems.
- Maintenance: Using Boot Camp requires more maintenance and updates than using virtualization software, as each operating system must be updated and maintained separately.
System Requirements for Running Windows on Mac
Before you can run Windows on your Mac, there are some system requirements you need to consider. These include:
- A compatible Mac model: Not all Macs can run Windows using Boot Camp or virtualization software. Check Apple’s official support pages to see if your Mac is compatible with the latest versions of macOS and Windows.
- Sufficient storage space: Running Windows on a Mac requires a significant amount of storage space, especially if you plan to install and run multiple applications or software.
- Adequate RAM and CPU: Running Windows on a virtual machine or natively using Boot Camp requires more system resources than running macOS alone. Make sure your Mac has enough RAM and CPU power to handle the demands of both operating systems.
- Windows installation media: You’ll need a valid license key and installation media for the version of Windows you want to run
Tips for Running Windows on a Mac
Here are some tips to help you get the most out of running Windows on your Mac:
- Use a wired mouse and keyboard: While macOS supports a wide range of third-party mice and keyboards, some Windows-specific features may not work properly with wireless or Bluetooth peripherals. Using a wired mouse and keyboard can provide a more reliable and consistent experience.
- Allocate enough system resources: Running Windows on a Mac requires a lot of system resources, so make sure you allocate enough RAM and CPU power to the virtual machine or Boot Camp partition. You may need to adjust these settings as you use different applications or software.
- Keep your software up-to-date: Both macOS and Windows require regular updates and maintenance to keep them running smoothly and securely. Make sure you keep both operating systems and any installed applications up-to-date with the latest patches and updates.
- Use a good antivirus and malware scanner: Running Windows on a Mac can expose you to the same security risks as running Windows on a PC. Make sure you use a reputable antivirus and malware scanner to protect both your Windows and macOS environments.
- Use a backup solution: Running Windows on a Mac can increase the risk of data loss or corruption. Make sure you use a reliable backup solution to regularly back up both your Windows and macOS environments to protect against data loss or corruption.
Conclusion
Running Windows on a Mac can provide a lot of benefits, such as improved flexibility, compatibility, and security. However, it’s important to choose the right method for your needs and to carefully consider the system requirements and potential drawbacks before getting started.
Whether you choose to use virtualization software or Apple’s Boot Camp, make sure you allocate enough system resources and keep both operating systems and any installed software up-to-date to ensure a smooth and reliable experience.
By following the tips and best practices outlined in this article, you can successfully run Windows on your Mac and enjoy the best of both worlds.
FAQs
Can I run Windows and macOS simultaneously on a Mac?
No, you cannot run both operating systems simultaneously on a Mac. You must choose which operating system to run at startup.
Which method is better for running Windows on a Mac – virtualization software or Boot Camp?
The choice depends on your needs and preferences. Virtualization software is more flexible and allows you to switch between operating systems without rebooting, while Boot Camp provides better performance and integration with Windows-specific hardware or software.
Do I need a separate Windows license to run Windows on a Mac?
Yes, you need a valid license key and installation media for the version of Windows you want to run on your Mac.
How much storage space do I need to run Windows on a Mac?
Running Windows on a Mac requires a significant amount of storage space, depending on the version of Windows and the applications you want to run. Make sure you have enough available storage space before installing Windows.
Can I run Windows-specific games or software on a Mac?
Yes, you can run almost any Windows application or software on a Mac using virtualization software or Boot Camp. However, some software or hardware may not work properly or at all in a Boot Camp environment, especially if it requires macOS-specific drivers or features.
Can I share files between Windows and macOS when running Windows on a Mac?
Yes, you can share files between the two operating systems. In a virtualization software environment, you can use shared folders or drag and drop files between the two environments. In a Boot Camp environment, you can access macOS files from within Windows by mounting the macOS partition as a drive.
Can I use Windows-specific hardware or peripherals on a Mac running Windows?
Yes, you can use most Windows-specific hardware or peripherals on a Mac running Windows using Boot Camp. However, some devices may not work properly or at all if they require macOS-specific drivers or features.
How do I switch between macOS and Windows when running Windows on a Mac?
In a virtualization software environment, you can switch between macOS and Windows by using a keyboard shortcut or by clicking a button in the virtualization software. In a Boot Camp environment, you must restart your Mac and choose the desired operating system at startup.
Can I run multiple versions of Windows on a Mac?
Yes, you can run multiple versions of Windows on a Mac using virtualization software. You can create separate virtual machines for each version of Windows or install multiple versions on a single virtual machine.
Can I use a touchscreen display with Windows on a Mac?
Yes, you can use a touchscreen display with Windows on a Mac using Boot Camp, provided that the display supports Windows touch input. However, touchscreen support may be limited or unavailable in a virtualization software environment.
Can I run multiple virtual machines on Parallels Desktop for Mac?
es, you can run multiple virtual machines on Parallels Desktop for Mac.
Can I use Parallels Desktop for Mac to run Windows games?
Yes, Parallels Desktop for Mac supports DirectX 11 and OpenGL 3.3, which means you can run graphics-intensive applications such as games.
Can I share files between Mac and Windows on Parallels Desktop for Mac?
Yes, you can easily share files between Mac and Windows on Parallels Desktop for Mac. You can use the shared folders feature to access files on your Mac from Windows, and vice versa.
Does Parallels Desktop for Mac offer any support for Linux?
Yes, Parallels Desktop for Mac supports running various versions of Linux as well as other operating systems, such as Chrome OS and Android.
What is the difference between the standard and Pro editions of Parallels Desktop for Mac?
The Pro edition of Parallels Desktop for Mac includes additional features, such as support for nested virtualization, networking tools, and integration with popular developer tools.
More posts

How to Run Windows XP on a Mac: A Step-by-Step Guide
If you own a Mac but need to run Windows XP for some reason, you might think it’s impossible. However, thanks to modern…

Windows or Mac for Programming: Which One is Better?
Programming is one of the most in-demand skills in today’s job market. However, when it comes to choosing the right operating system for…

Can I Run Windows on MacBook Air? Everything You Need to Know
MacBook Air is a fantastic laptop that has gained a lot of popularity in recent years due to its sleek design, high portability,…

How to Run Windows on Mac from External Hard Drive: A Comprehensive Guide
Are you a Mac user who needs to run Windows applications for work or personal use? While there are several ways to do…

Can You Make Windows from Mac? Exploring the Possibility of Running Windows on a Mac
If you’re a Mac user but need to use software or applications that are only available on Windows, you may be wondering if…

How to Run Microsoft Mac Office Using Parallels: A Step-by-Step Guide
If you’re a Mac user, you may be wondering how to run Microsoft Office on your device. Fortunately, there is a solution that…